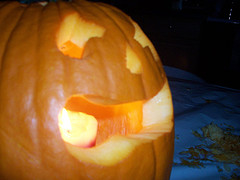
If you’re doing some pumpkin carving this weekend, here are my tips for a fun and successful experience:
1.) Choose a big pumpkin. Bigger ones are nicer looking, give you more room to carve your pattern, and generally are more sturdy. You’ll also want to look for a nice carving area- so only choose as big as the one with a good carving surface. You’ll thank yourself later.
2.) Prepare the space. Your kitchen table is the ideal spot. Clear it completely off, then lay down newspaper (or spread out a roll of wrapping paper). Set out a big bowl for the pumpkin insides, and get a baking sheet ready with wax paper on it if you plan to bake the seeds.

3.) Cut a big enough hole in the top. You only have one shot (if you want to put the cap back on), so make sure it’s big enough to fit your hand in- and to put a candle in if you so desire! The best approach here is to trace out a big enough hole with a pencil- then cut on that mark. You’ll want to use a serrated knife; that’s your best bet for getting a clean, easy cut.
4.) Scoop right. After you’ve cut the hole, scoop out what you can carefully with your bare hands. Separate the seeds onto the baking sheet if desired. Then, grab a ladle or big plastic spoon and use it to carefully scrape around the inner wall of the pumpkin. When you’ve got a pile of insides in the bottom, grab them out with your hands and drop them into the bowl you’ve got waiting. Repeat this process until the sides are clean and flat.
5.) Clean and prep. Before you get ready to transform your pumpkin into a jack-o-lantern, clean up your space and your pumpkin. First, remove the bowl of insides and set the baking sheet of seeds off to the side. Then, grab a damp washcloth (not paper towel!) and gently wash the outside of the pumpkin. Remove any dirt stuck between the ribbing and any goop that may have stuck to it. Then, carefully wipe the pumpkin with a dry towel. Wash your hands, and you’re ready to carve!
6.) Plan your design. It’s important to plan what design what you’re going to carve before carving it. First, draw your pattern/design on a piece of paper, or print out one of the thousands of free ones available on the internet (Try this Google search: pumpkin patterns). Unless your an expert, the simpler the design is, the more happy you’re likely to be with the results.
7.) Set and trace Grab a pencil and choose the flattest, most attractive side of your pumpkin. Then, lay your paper flat on the surface of the pumpkin and slowly trace over the paper design using a sharp pencil. Don’t move the paper until you’ve traced the whole design! Then, check the results to make sure you’ve pressed hard enough to leave at least a faint outline on the pumpkin. That’s all you’ll need- just enough to see it as you’re scoring, but not enough to leave a lasting impression.
8.) Score it! Before you dig in, you’ll need to take an important and often overlooked step: scoring your design. This is also the most difficult and dangerous step- and this is probably where you should relieve your children of duty and finish up for yourself. What you’ll want to do is grab either a craft knife (commonly called an Exacto knife), or a nail with a smallish head, and trace over your pattern by making small indents, or score marks, along the pattern. You’ll want to push the knife or nail pretty far into the pumpkin, breaking through the wall or coming close to it with each score mark. When you’ve carefully scored the entire pattern, you’ll find the cutting quick, easy, and much more accurate.
9.) Time to carve! First, find a serrated knife. This cannot be stressed enough: Find a serrated knife! Most kitchen knife sets will have at least one. If not, borrow one. Again, let your kids look on, but make sure an adult handles this step. You’ll want to start at the top of your design, and carefully guide your knife along the score marks of your design. When you reach a corner, remove the knife and put it back in again, approaching the corner from the opposite direction. For curves, cut slowly but don’t stop at any point in the curve- stopping may turn the curve into a hard angle, and nobody wants that. Finally, when you’ve broken through a part of the design- say an eye or a nose- don’t push the piece out, but rather cut it cleanly off. Then, carefully trim the edges of each section so that they’re flat with no hanging pieces anywhere.
10.) Want to light things up? This is not the place to extol upon the dangers of candles. So let’s assume you know how dangerous they can be. To add a candle to your jack-o-lantern, make sure the inside bottom of your pumpkin is flat. If it’s not, carefully trim the raised portion until you’ve got it flat. Then, choose a candle that’s as wide as you can fit through your hole, yet short enough not to show too much through the holes of your design. Using an Aim-a-flame, or similar brand of extended lighter, carefully light the candle, turn off the lights, stand back, and enjoy your creation! For best results, don’t put the top on the pumpkin when the candle is going.


Leave a Reply